> ## Documentation Index
> Fetch the complete documentation index at: https://docs.archetypeai.app/llms.txt
> Use this file to discover all available pages before exploring further.
# Telegram Bot Setup
> Set up a Telegram bot for remote video monitoring control
## Step 1: Create the Bot
Go to [https://web.telegram.org/](https://web.telegram.org/) and log into your Telegram account
Open a new chat with BotFather → [https://web.telegram.org/k/#@BotFather](https://web.telegram.org/k/#@BotFather)
1. Click **Start**
2. Type `/newbot` and follow the instructions in the chat
You'll receive a message with the bot token. It should follow the format `12345812:AAHFfasdfasdf`. Store it securely.
### Example Bot Token Message
```
Done! Congratulations on your new bot. You will find it at t.me/testing_atai_bot.
Use this token to access the HTTP API:
796286017123123:AAHfDqivpCQXxM5SNt_BqBjNANddAdowHJASJU
Keep your token secure and store it safely, it can be used by anyone to control your bot.
```
## Step 2: Get Your Chat ID
There are two simple ways to get your Chat ID:
### Option 1: Using @WhatChatIDBot
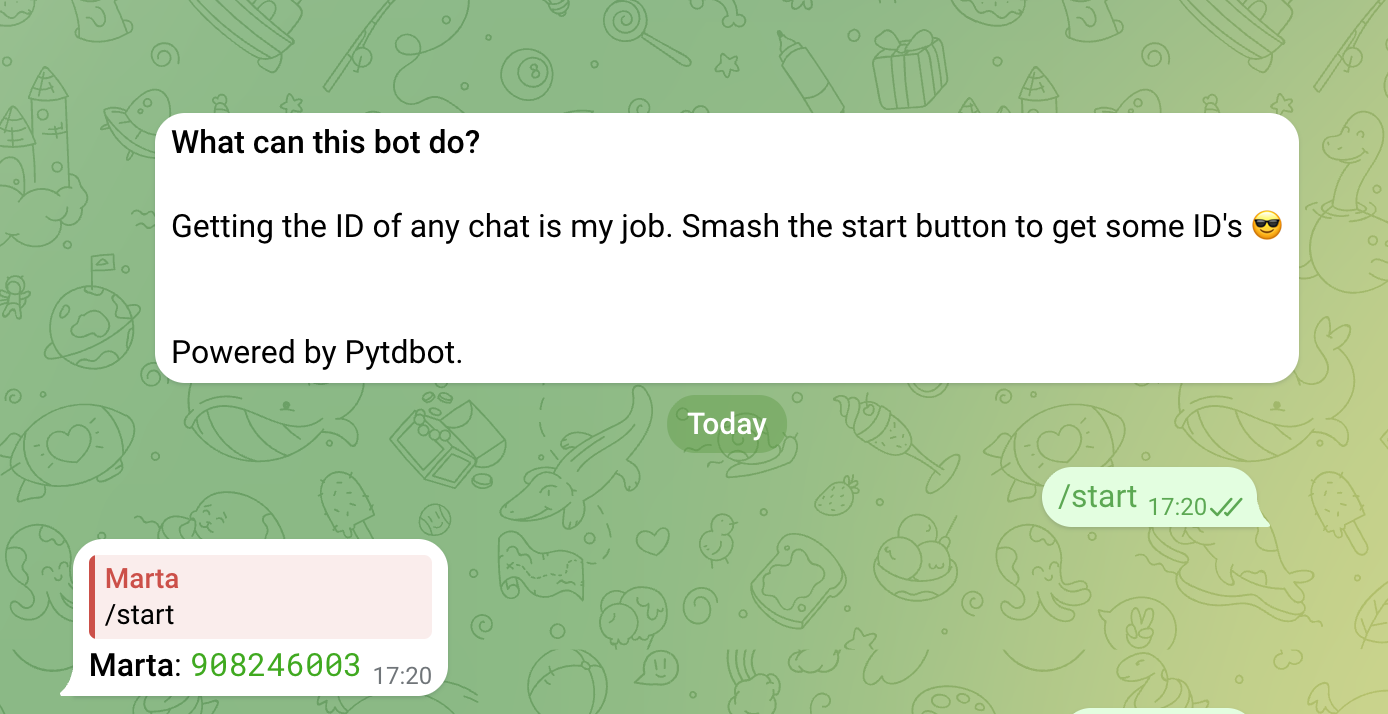
Start a conversation with [@WhatChatIDBot](https://t.me/WhatChatIDBot) in Telegram
The bot will give you a number - that's your Chat ID (e.g., `908246003`)
 ### Option 2: Using @RawDataBot
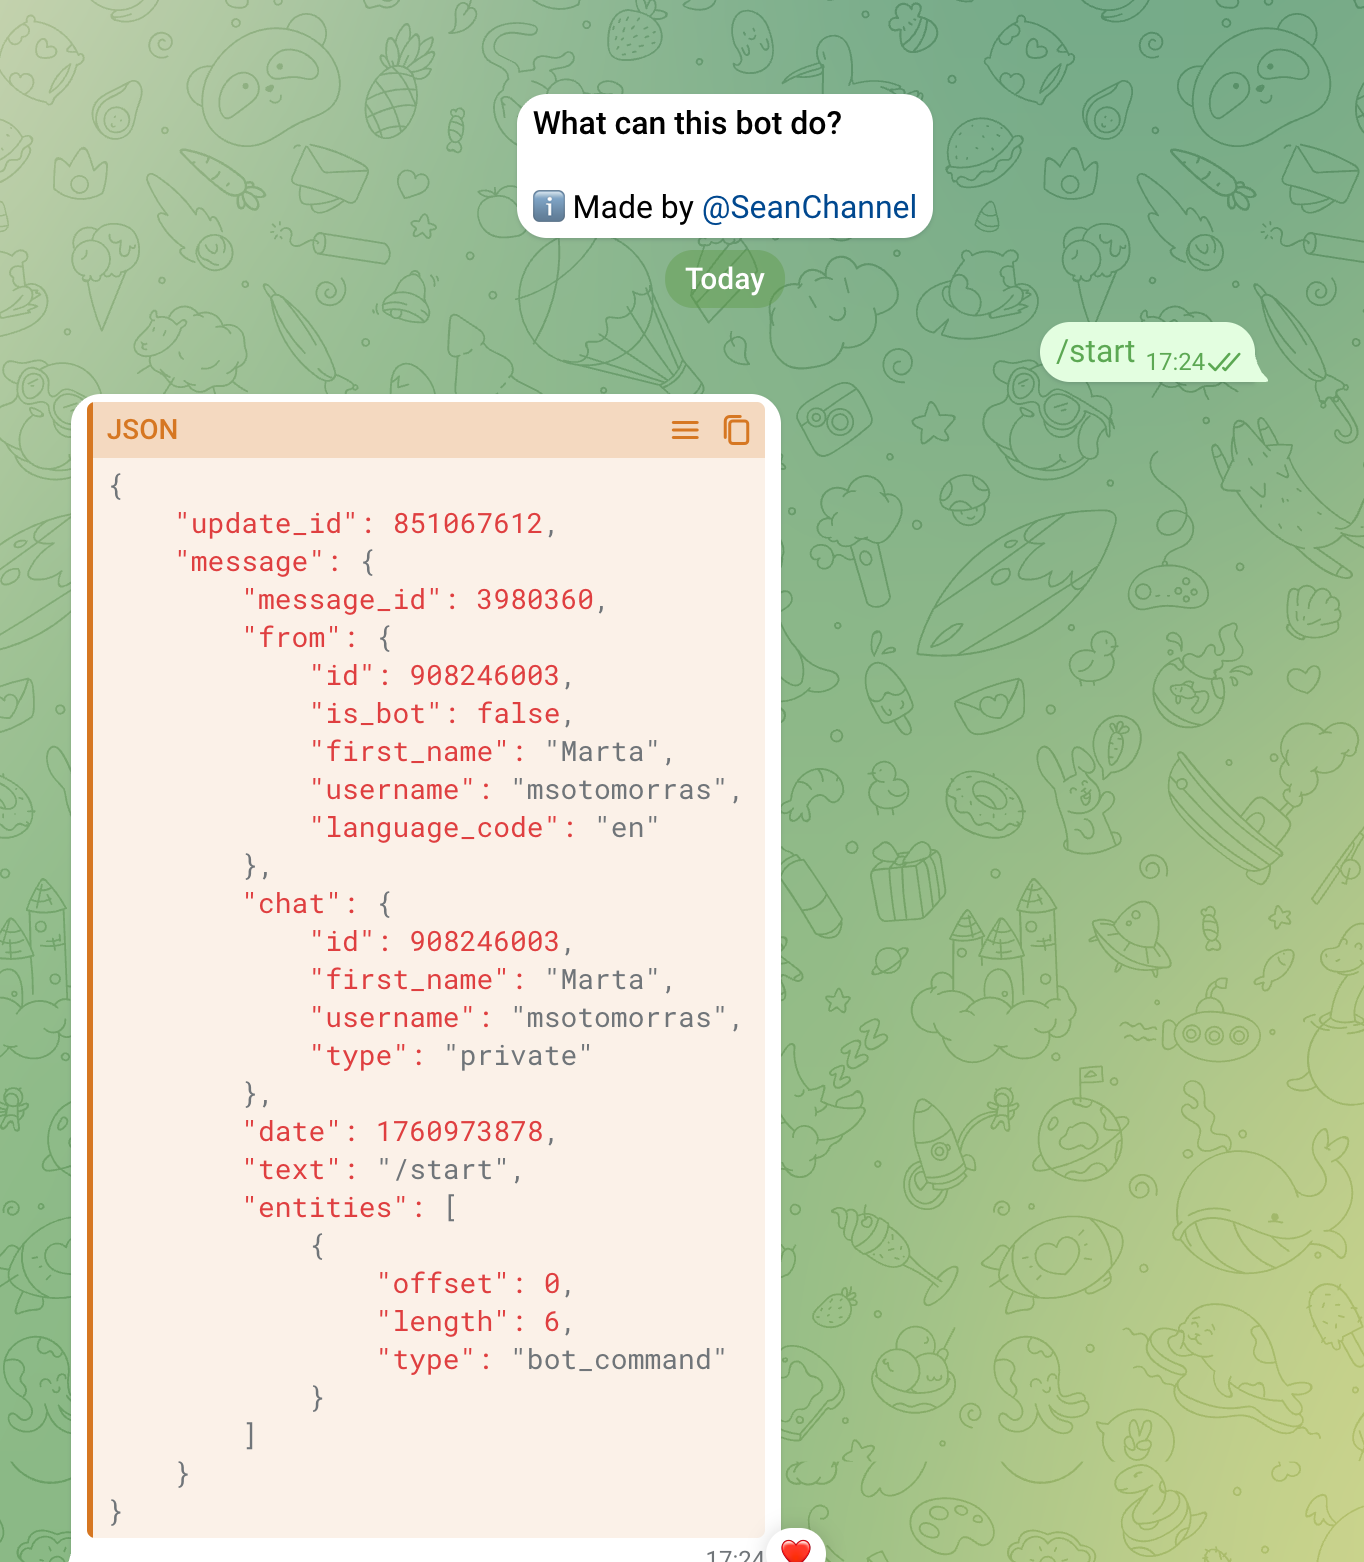
Start a conversation with [@RawDataBot](https://t.me/RawDataBot) in Telegram
The bot will return JSON data. Copy the `id` field - that's your Chat ID
### Option 2: Using @RawDataBot
Start a conversation with [@RawDataBot](https://t.me/RawDataBot) in Telegram
The bot will return JSON data. Copy the `id` field - that's your Chat ID
 ## Step 3: Add Your Credentials
Now you should have both:
* **Bot Token**: `796286017123123:AAHfDqivpCQXxM5SNt_BqBjNANddAdowHJASJU`
* **Chat ID**: `908246003`
### Update Application Code
Add these credentials to your application:
```python app_telegram.py theme={"system"}
# Update these values in your code
BOT_TOKEN = "796286017123123:AAHfDqivpCQXxM5SNt_BqBjNANddAdowHJASJU"
CHAT_ID = "908246003"
```
```bash Environment Variables (Recommended) theme={"system"}
# Create .env file
TELEGRAM_BOT_TOKEN=796286017123123:AAHfDqivpCQXxM5SNt_BqBjNANddAdowHJASJU
TELEGRAM_CHAT_ID=908246003
```
## Step 4: Test the Connection
Run the bot application: `python app_telegram.py`
Send `/start` to your bot in Telegram
Your bot should respond with available commands and usage instructions
## Step 3: Add Your Credentials
Now you should have both:
* **Bot Token**: `796286017123123:AAHfDqivpCQXxM5SNt_BqBjNANddAdowHJASJU`
* **Chat ID**: `908246003`
### Update Application Code
Add these credentials to your application:
```python app_telegram.py theme={"system"}
# Update these values in your code
BOT_TOKEN = "796286017123123:AAHfDqivpCQXxM5SNt_BqBjNANddAdowHJASJU"
CHAT_ID = "908246003"
```
```bash Environment Variables (Recommended) theme={"system"}
# Create .env file
TELEGRAM_BOT_TOKEN=796286017123123:AAHfDqivpCQXxM5SNt_BqBjNANddAdowHJASJU
TELEGRAM_CHAT_ID=908246003
```
## Step 4: Test the Connection
Run the bot application: `python app_telegram.py`
Send `/start` to your bot in Telegram
Your bot should respond with available commands and usage instructions