> ## Documentation Index
> Fetch the complete documentation index at: https://docs.archetypeai.app/llms.txt
> Use this file to discover all available pages before exploring further.
> ## Agent Instructions
> Start with /introduction/getting-started. Use the Direct Query API (POST /api/query) with the Newton Fusion model (text, image, and video reasoning) or the Newton Omega encoder (time-series embeddings). ATAI_API_ENDPOINT is the base URL https://api.u1.archetypeai.app with no version path; every endpoint path begins with /api. Pages whose descriptions are marked (Archived) document the legacy Lens runtime — do not use them for new projects.
# Evals
> Create, monitor, and manage evals using the Developer Console.
To create, manage, and monitor evals using the Developer Console, click on **Evals** in the
sidebar. This opens a page listing the existing evals. The list is sorted in reverse chronological
order by creation date, and can be filtered by blueprint and status. A search field lets you
search for the eval you're looking for.
## Creating an Eval
To create an eval:
This opens the **New Eval** page, which is structurally very similar to
the **New Optimization** page: the left side of the page features controls to configure the
eval, while the right side displays the current JSON configuration for the eval.
Type a human-readable name for your new eval in the **Name** field. If you leave this
field blank, a name will be created for you, in the form `eval-`.
Next, click the blueprint you want to evaluate in the blueprint palette below where you
entered the eval's name.
Next, configure the eval. Enter a list of file IDs for the example files to process,
then specify the ground truth target and column.
Click the **Create eval** button to create and run the new eval.
Once you create the eval, its details page is presented.
## Viewing Eval Details
The eval details page can be opened by clicking on any eval in the list on the main Evals page.
This page features two top-level tabs:
* The **Progress** tab displays the current state of the eval, including how many rows have been
scored, how long the eval has been running, and other statistics. Also available are two
sub-tabs: one displaying the list of example files, and one listing the predictions generated
by the job.
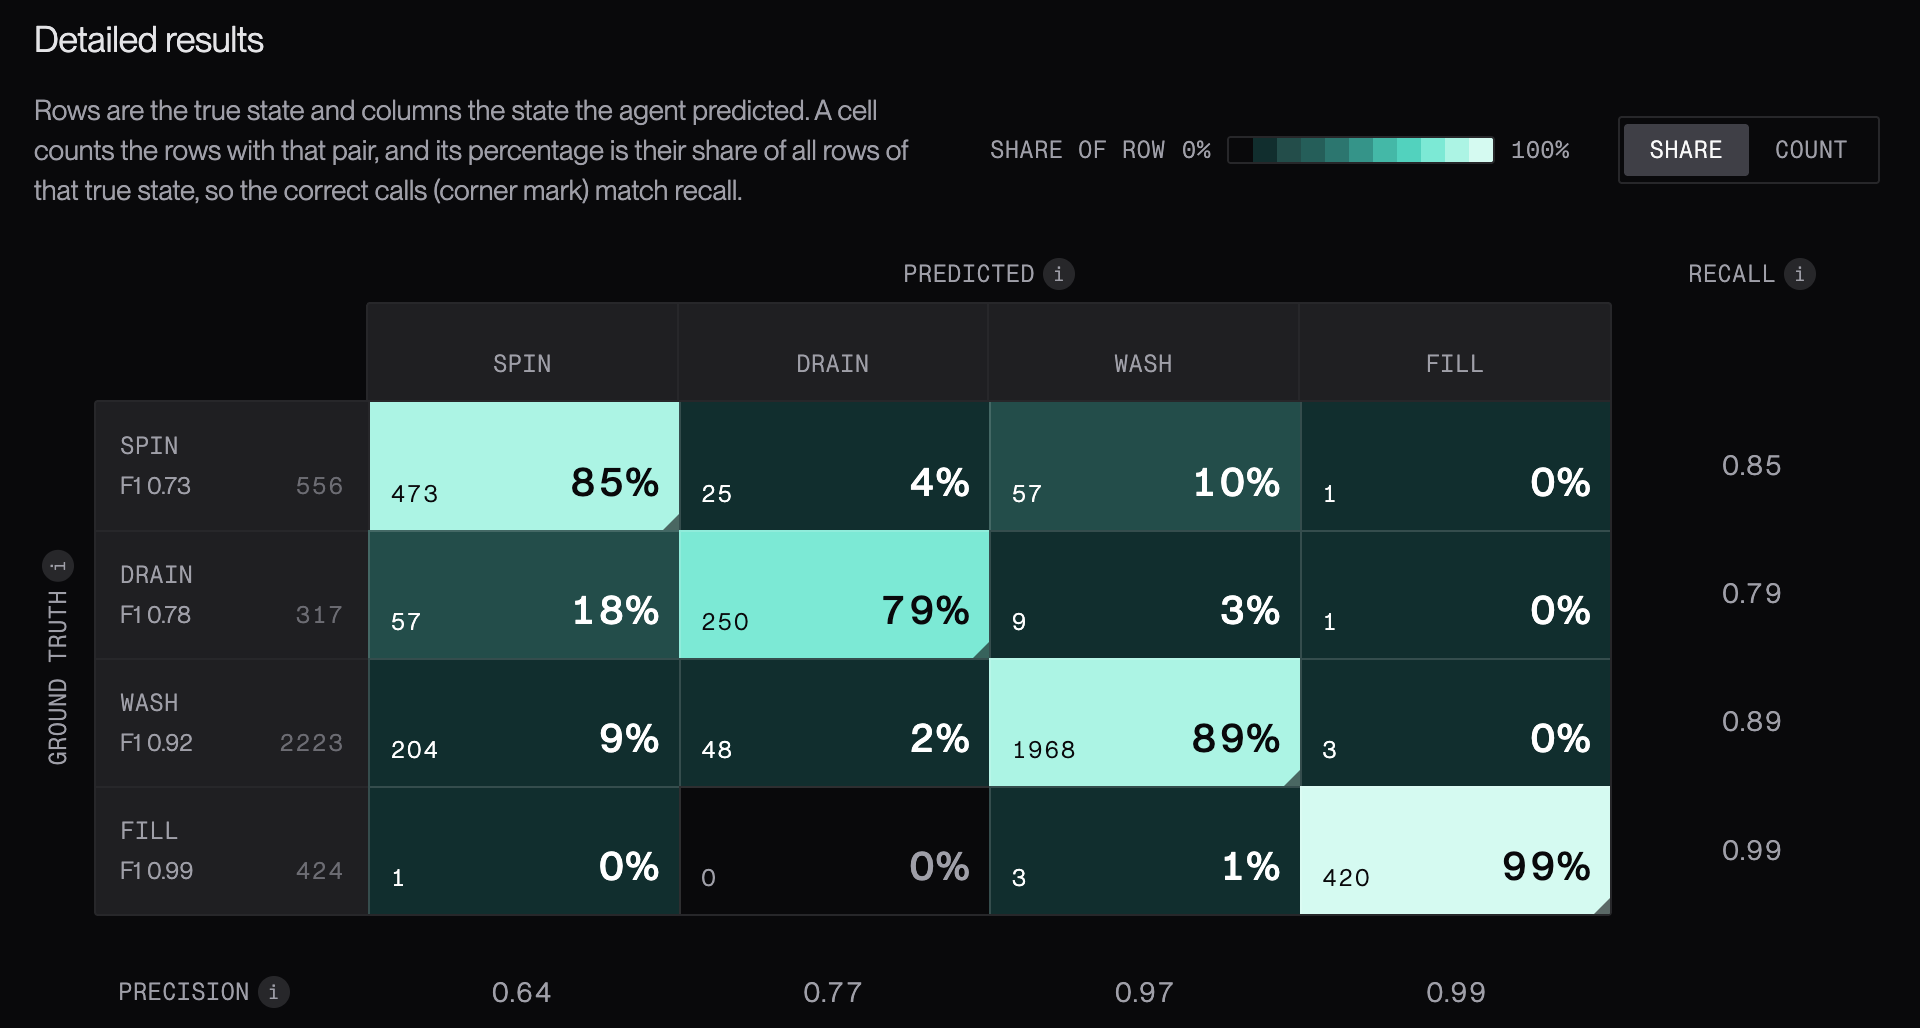
* The **Results** tab displays the tab's headline score as chosen by the blueprint, its
accuracy, and other statistics. Under **Detailed results**, you'll find a [confusion
matrix](https://en.wikipedia.org/wiki/Confusion_matrix) in which rows represent the true state
while columns state the value predicted by the agent. The diagonal line from top-left to
bottom-right represents the cases where the prediction matched ground truth.
 This documentation is built and hosted on [Mintlify](https://mintlify.com), a developer documentation platform.