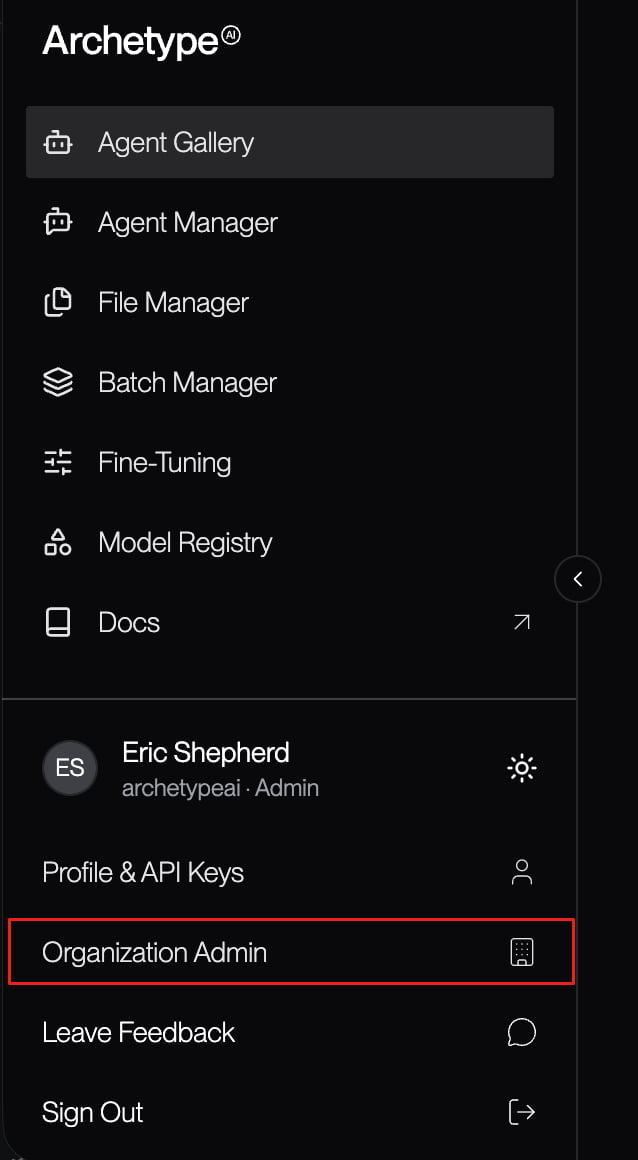
If you are an administrator for your organization, the Archetype Developer Console offers access to organization administration features through the **Organization Admin** option in the account panel at the bottom of the sidebar.
With this interface, you can view and manage your organization's users and their API keys and add and delete users. In addition, you can set the default role for new SSO users.
 ## Organization Details
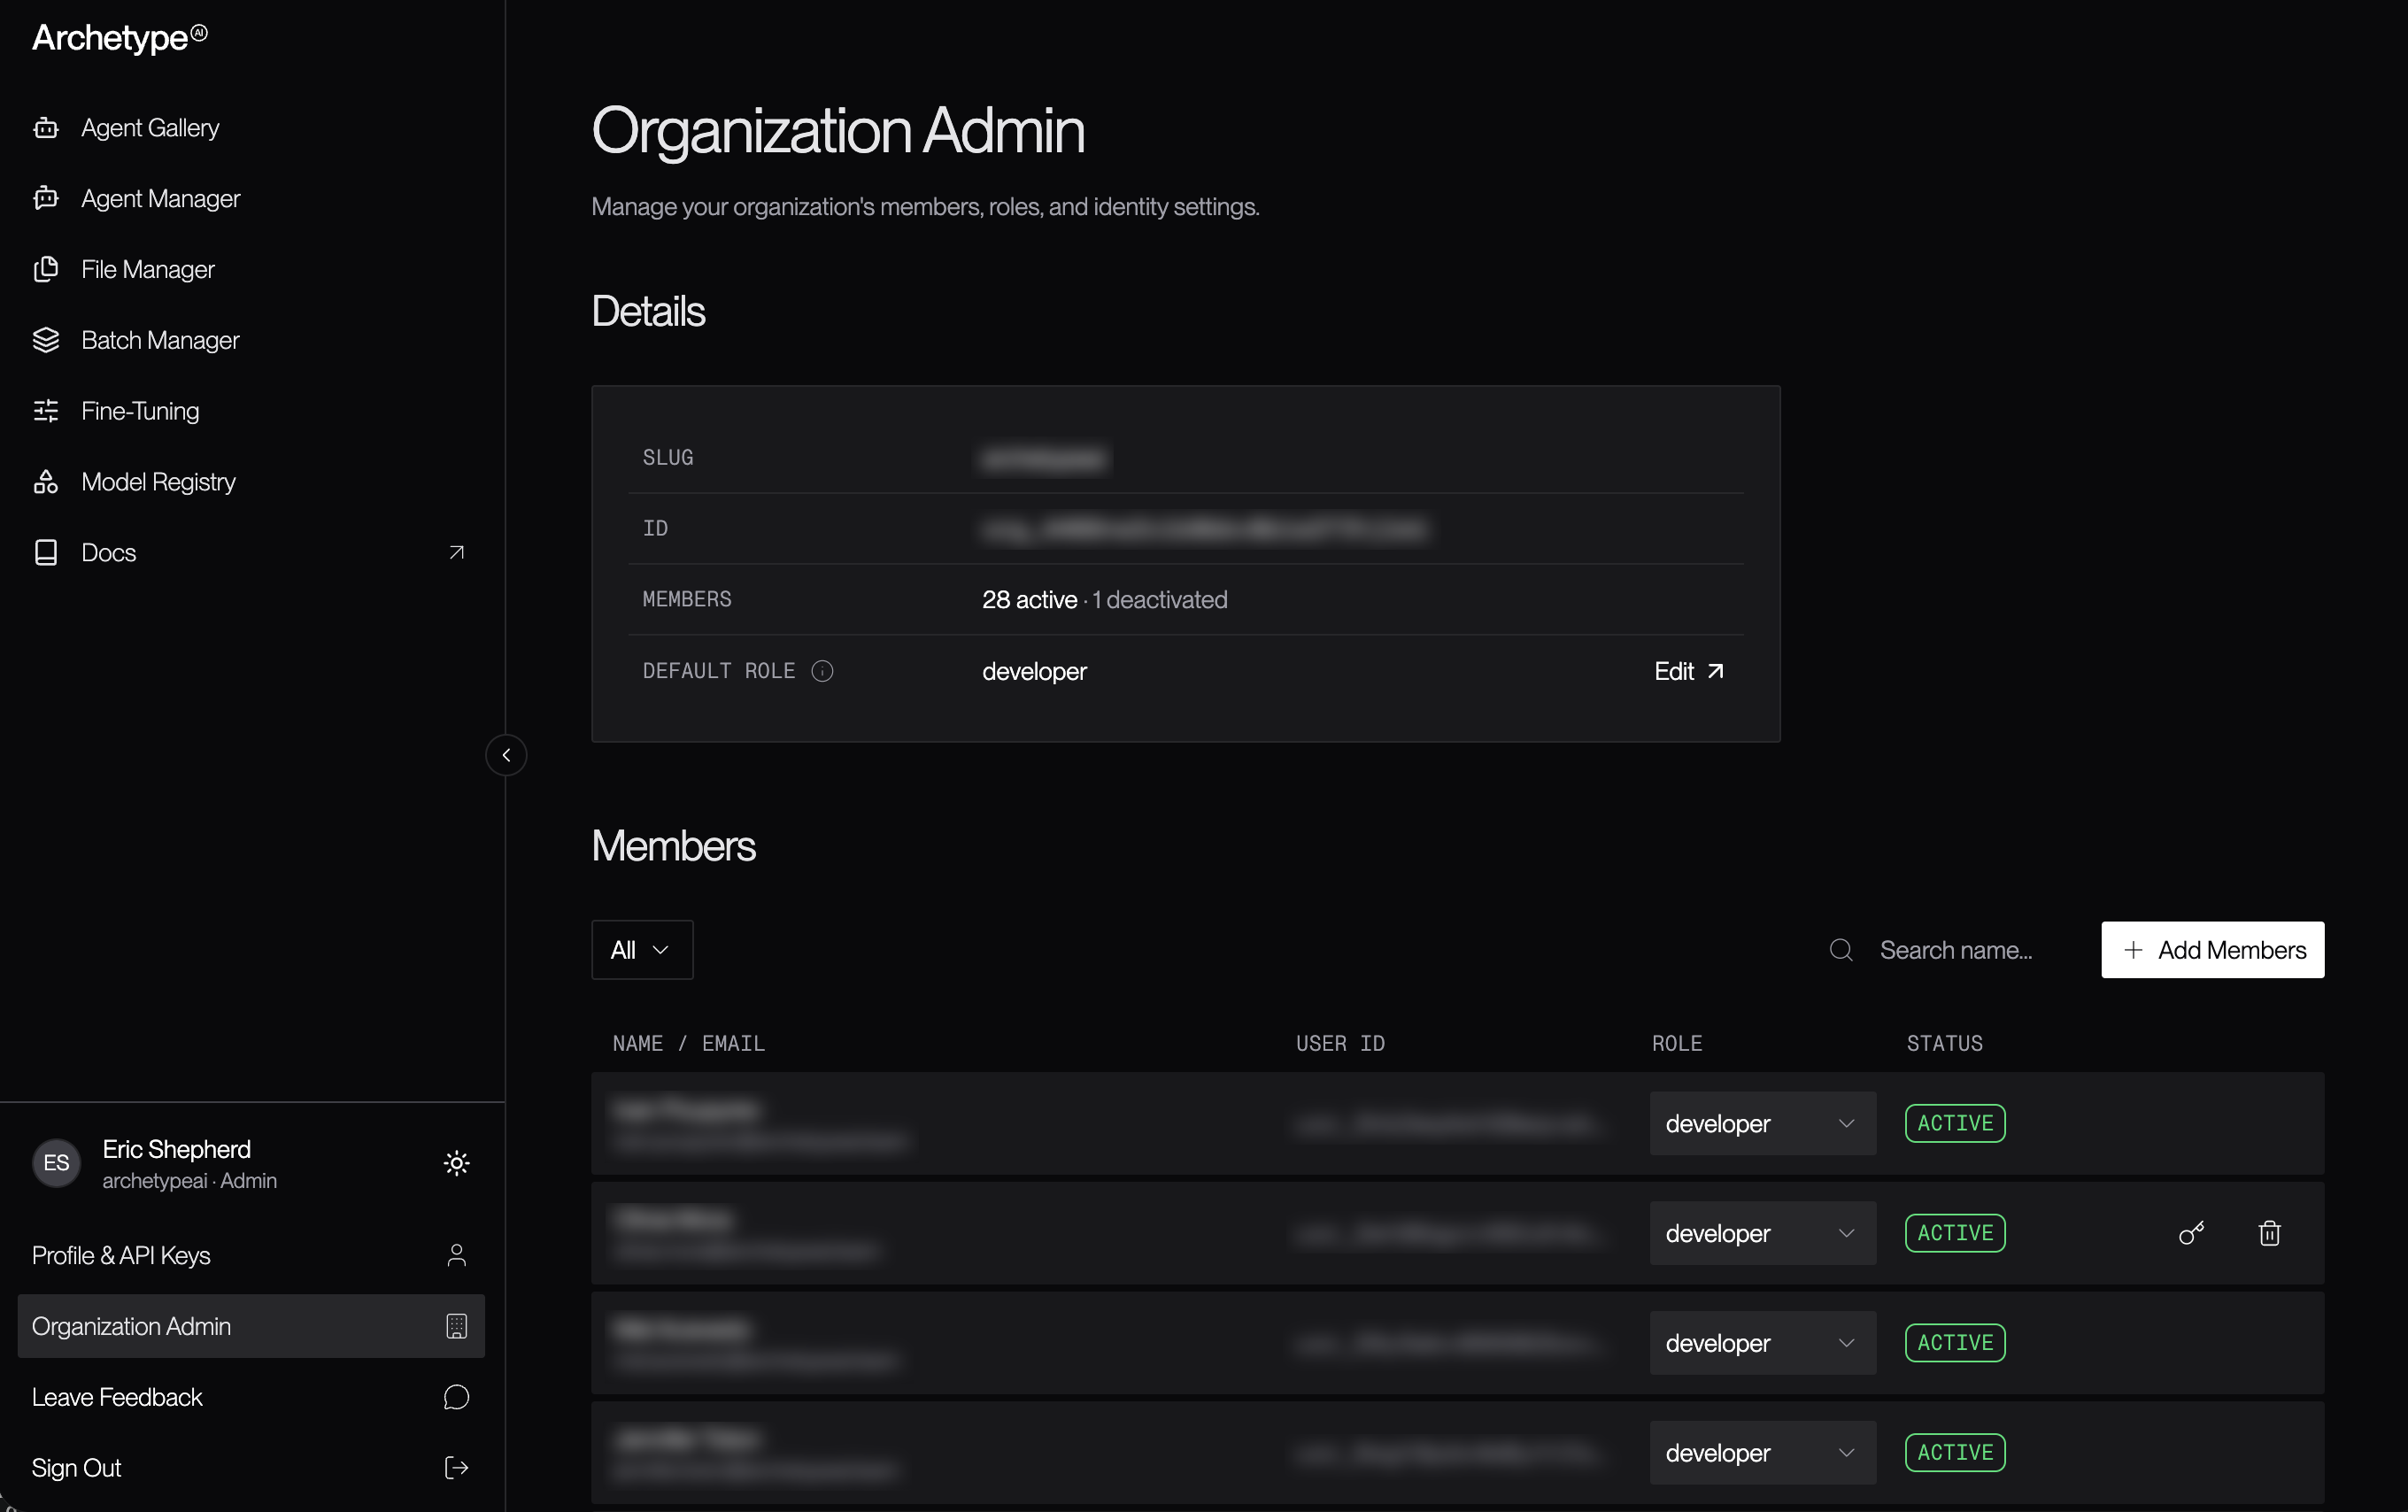
The **Organization Admin** page displays at the top of the page a box containing information
about the organization:
* The organization's "slug," which is a short-form human-readable identifier for the
organization.
* The organization's unique ID, starting with `org_`.
* The number of members in the organization, as well as the number of currently deactivated
members.
* The organization's default role; this is the role automatically assigned to new SSO users.
## Changing the Default Role
To change the default role applied to new SSO users, click the **Edit** button to the right of
the current default role in the **Details** panel at the top of the page.
## Organization Details
The **Organization Admin** page displays at the top of the page a box containing information
about the organization:
* The organization's "slug," which is a short-form human-readable identifier for the
organization.
* The organization's unique ID, starting with `org_`.
* The number of members in the organization, as well as the number of currently deactivated
members.
* The organization's default role; this is the role automatically assigned to new SSO users.
## Changing the Default Role
To change the default role applied to new SSO users, click the **Edit** button to the right of
the current default role in the **Details** panel at the top of the page.
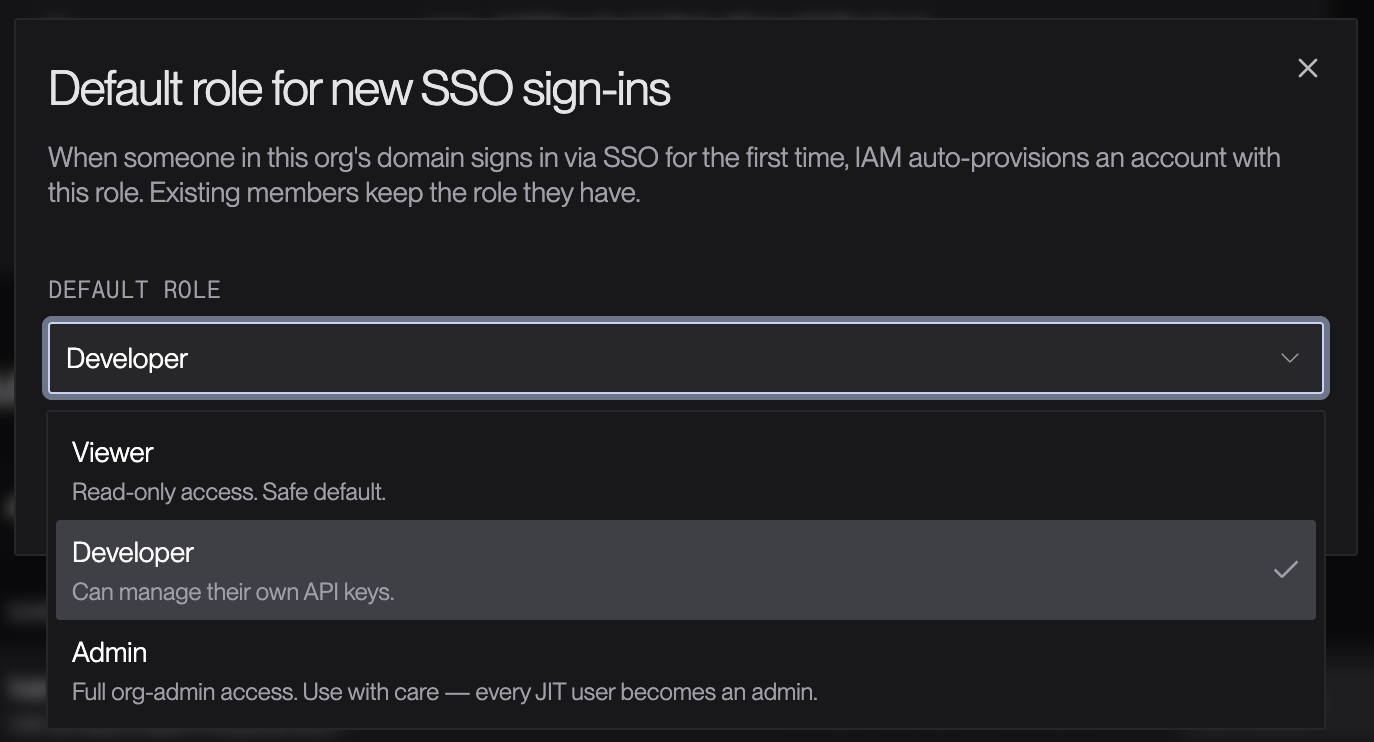 Use the **Default Role** popup to choose the default role for automatically-created SSO users;
these are users created automatically when they are part of your SSO cohort and attempt to sign
in, but do not yet have member accounts in your Archetype organization.
Each possible role is described in the user interface:
* **Viewer**: A safe default which grants read-only access to content.
* **Developer**: A role which allows the user to manage their own API keys.
* **Admin**: A role which grants full-organization administrative access. Every new SSO user is
becomes an administrator by default. **Use with caution.**
## Managing Members
Below the organization **Details** panel is a list of the organization's members. At the top of
the list is a row including the following:
* A popup which lets you filter by the user's role.
* A search box.
* The **+ Add Members** button.
### Adding Members
To add one or more new users to your organization, click the **+ Add Members** button above the
top-right corner of the user list. This opens the **Add Members** dialog:
Use the **Default Role** popup to choose the default role for automatically-created SSO users;
these are users created automatically when they are part of your SSO cohort and attempt to sign
in, but do not yet have member accounts in your Archetype organization.
Each possible role is described in the user interface:
* **Viewer**: A safe default which grants read-only access to content.
* **Developer**: A role which allows the user to manage their own API keys.
* **Admin**: A role which grants full-organization administrative access. Every new SSO user is
becomes an administrator by default. **Use with caution.**
## Managing Members
Below the organization **Details** panel is a list of the organization's members. At the top of
the list is a row including the following:
* A popup which lets you filter by the user's role.
* A search box.
* The **+ Add Members** button.
### Adding Members
To add one or more new users to your organization, click the **+ Add Members** button above the
top-right corner of the user list. This opens the **Add Members** dialog:
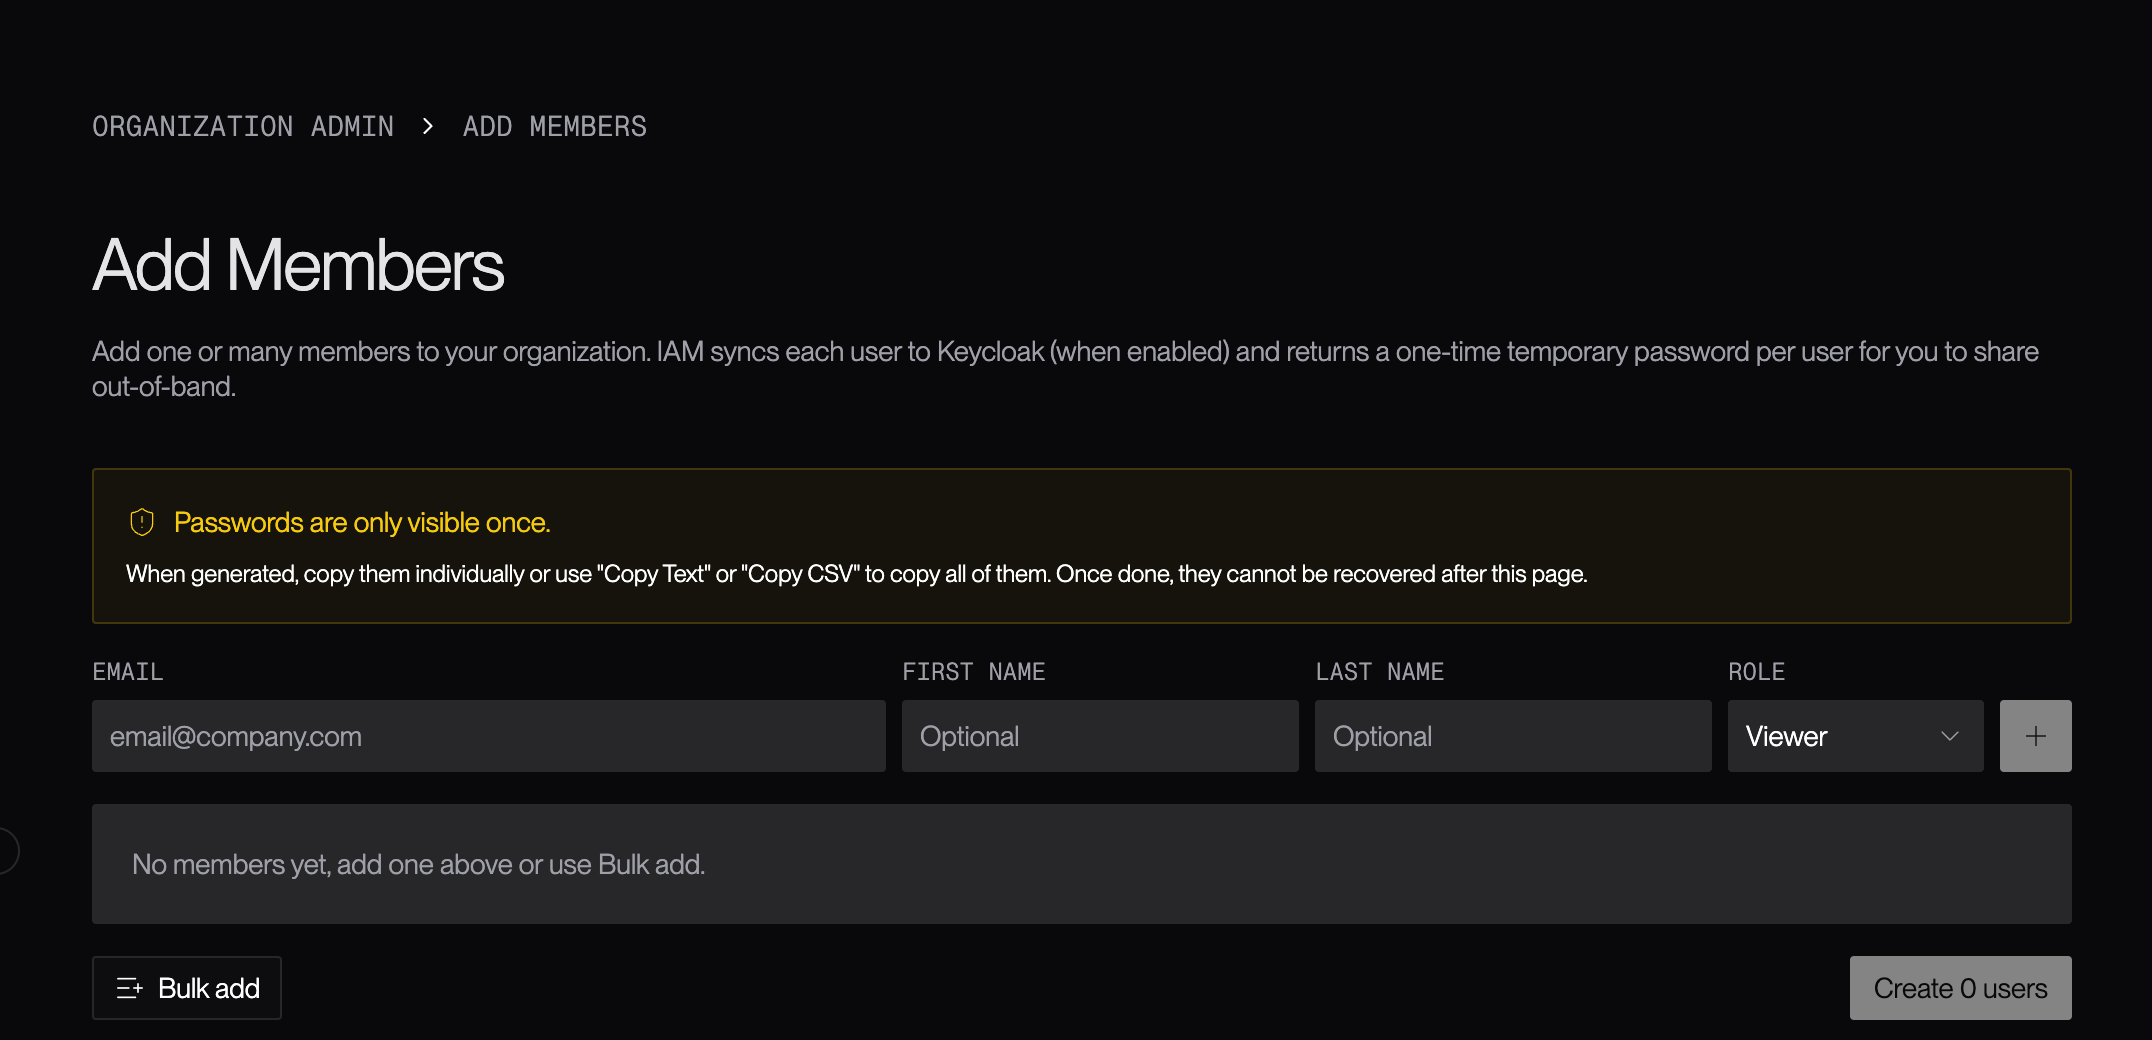 To add a member, enter their email address, first name, last name, and their role. To add
another member, click the **+** button at the right side of the row. Continue adding members
until they've all been added, then click the **Create *N* Users** button (where *N* is the
number of users to create).
You can optionally bulk add multiple users at once by clicking the **Bulk add** button at the
bottom-left of the panel. This opens the **Bulk add members** panel:
To add a member, enter their email address, first name, last name, and their role. To add
another member, click the **+** button at the right side of the row. Continue adding members
until they've all been added, then click the **Create *N* Users** button (where *N* is the
number of users to create).
You can optionally bulk add multiple users at once by clicking the **Bulk add** button at the
bottom-left of the panel. This opens the **Bulk add members** panel:
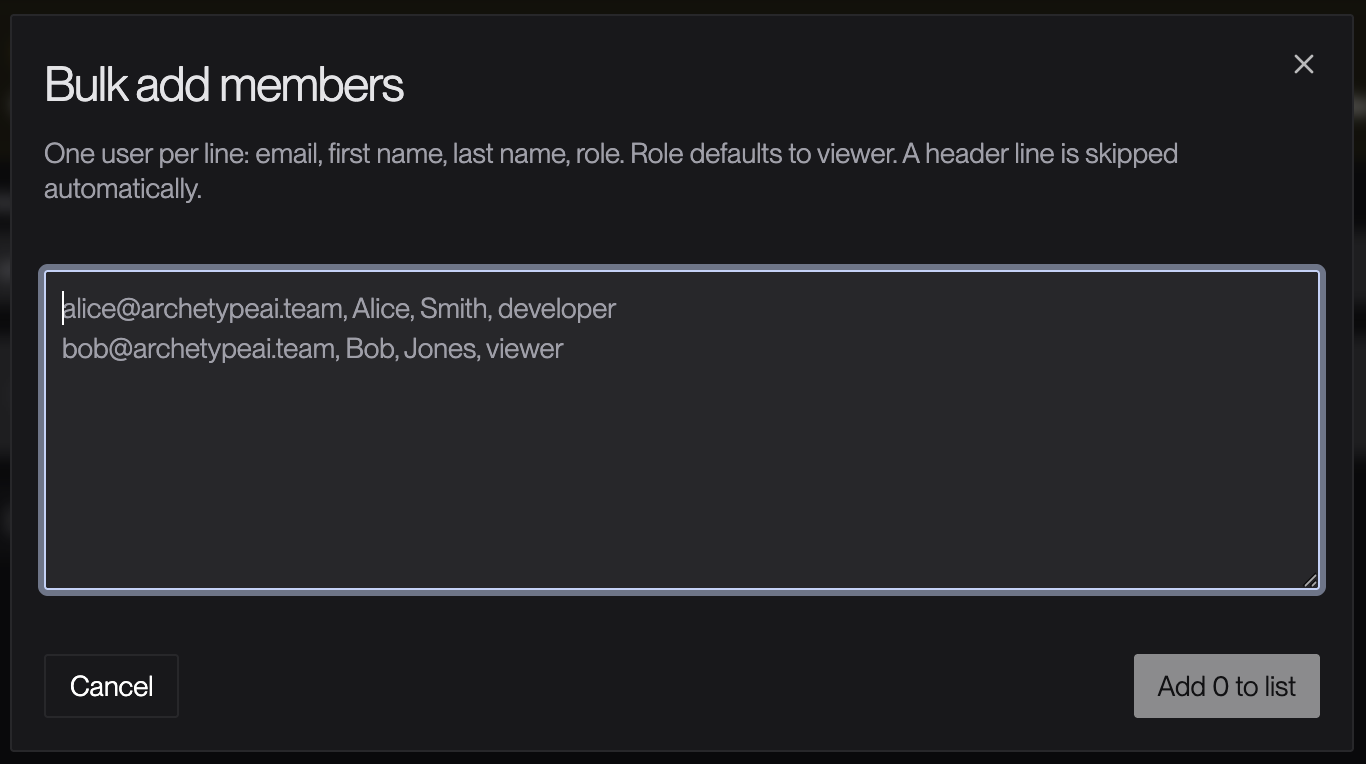 This panel lets you enter all the users in the format:
```
Email,Firstname,Lastname,Role
```
For example:
```
miguel.garcia@example.com,Miguel,Garcia,developer
alice.thomas@example.com,Alice,Thomas,admin
john.doe@example.com,John,Doe,viewer
```
If you paste CSV in the given format, a header row is automatically ignored if it exists.
Once you've entered (or pasted) all the users' information into the edit box, click the **Add *N*
to list** button (where *N* is the number of users in the list).
### Changing a User's Role
To change a user's role, click on the role popup in the user's row in the user list. Choose
their new role from the list.
### Managing a Member's API Keys
To manage a member's API keys, click the key icon to the right of the user's information in the
main Organization Admin panel. This opens the API keys panel for that user. For example:
This panel lets you enter all the users in the format:
```
Email,Firstname,Lastname,Role
```
For example:
```
miguel.garcia@example.com,Miguel,Garcia,developer
alice.thomas@example.com,Alice,Thomas,admin
john.doe@example.com,John,Doe,viewer
```
If you paste CSV in the given format, a header row is automatically ignored if it exists.
Once you've entered (or pasted) all the users' information into the edit box, click the **Add *N*
to list** button (where *N* is the number of users in the list).
### Changing a User's Role
To change a user's role, click on the role popup in the user's row in the user list. Choose
their new role from the list.
### Managing a Member's API Keys
To manage a member's API keys, click the key icon to the right of the user's information in the
main Organization Admin panel. This opens the API keys panel for that user. For example:
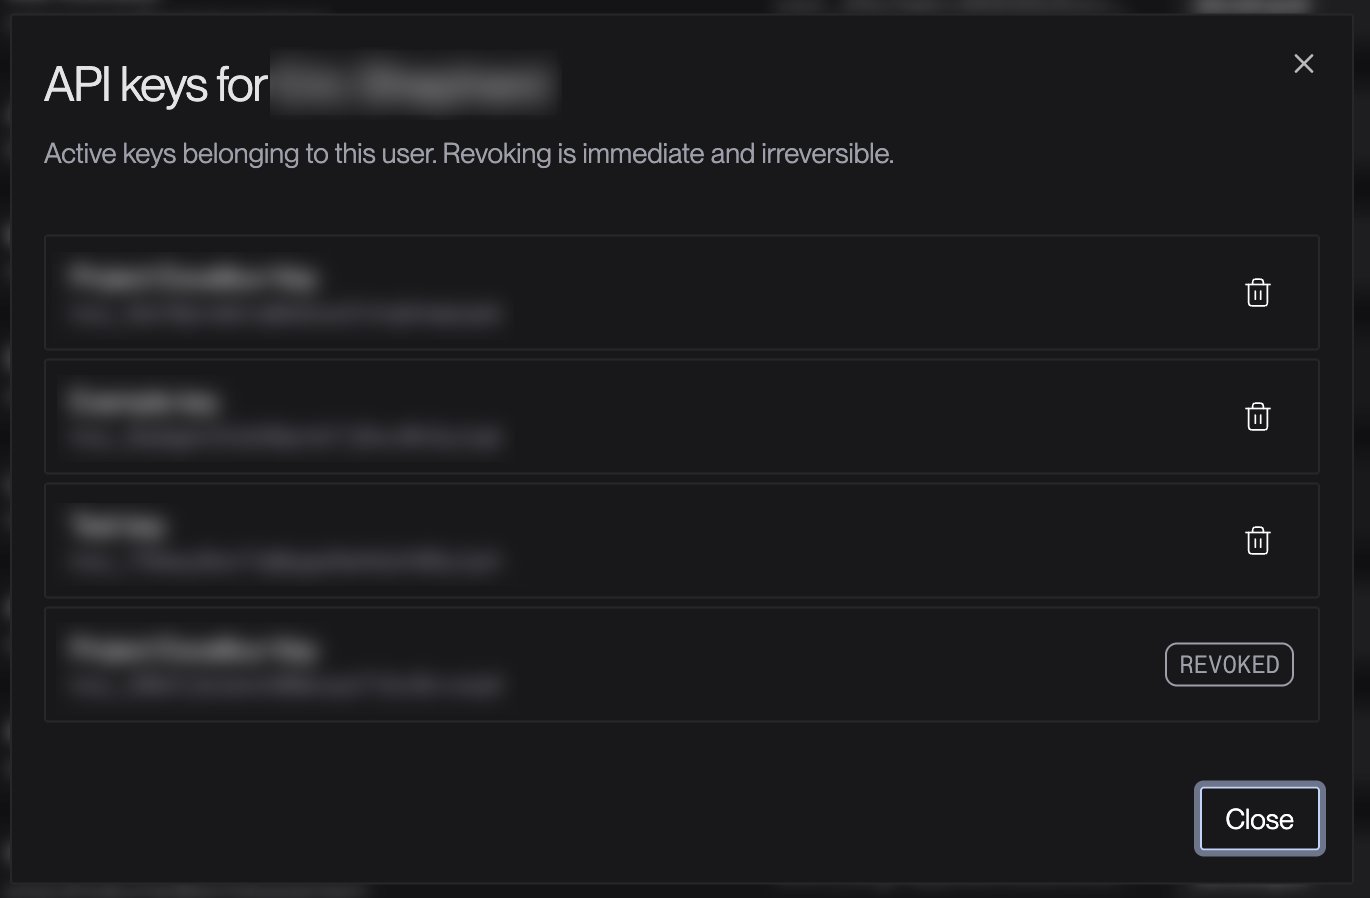 At the top is the user's name. Below is a list of the user's API keys, both active and revoked.
Each row in the list displays both the key's name and the key's ID. Secret API keys (the ones
you provide to the Archetype API) are not displayed.
To revoke an active key, press the
At the top is the user's name. Below is a list of the user's API keys, both active and revoked.
Each row in the list displays both the key's name and the key's ID. Secret API keys (the ones
you provide to the Archetype API) are not displayed.
To revoke an active key, press the