Creating an Eval
To create an eval:1
Click the +Create button
This opens the New Eval page, which is structurally very similar to
the New Optimization page: the left side of the page features controls to configure the
eval, while the right side displays the current JSON configuration for the eval.
2
Name the eval (optional)
Type a human-readable name for your new eval in the Name field. If you leave this
field blank, a name will be created for you, in the form
eval-<timestamp>.3
Select the blueprint to evaluate
Next, click the blueprint you want to evaluate in the blueprint palette below where you
entered the eval’s name.
4
Configure the eval
Next, configure the eval. Enter a list of file IDs for the example files to process,
then specify the ground truth target and column.
5
Create the new eval
Click the Create eval button to create and run the new eval.
Viewing Eval Details
The eval details page can be opened by clicking on any eval in the list on the main Evals page. This page features two top-level tabs:- The Progress tab displays the current state of the eval, including how many rows have been scored, how long the eval has been running, and other statistics. Also available are two sub-tabs: one displaying the list of example files, and one listing the predictions generated by the job.
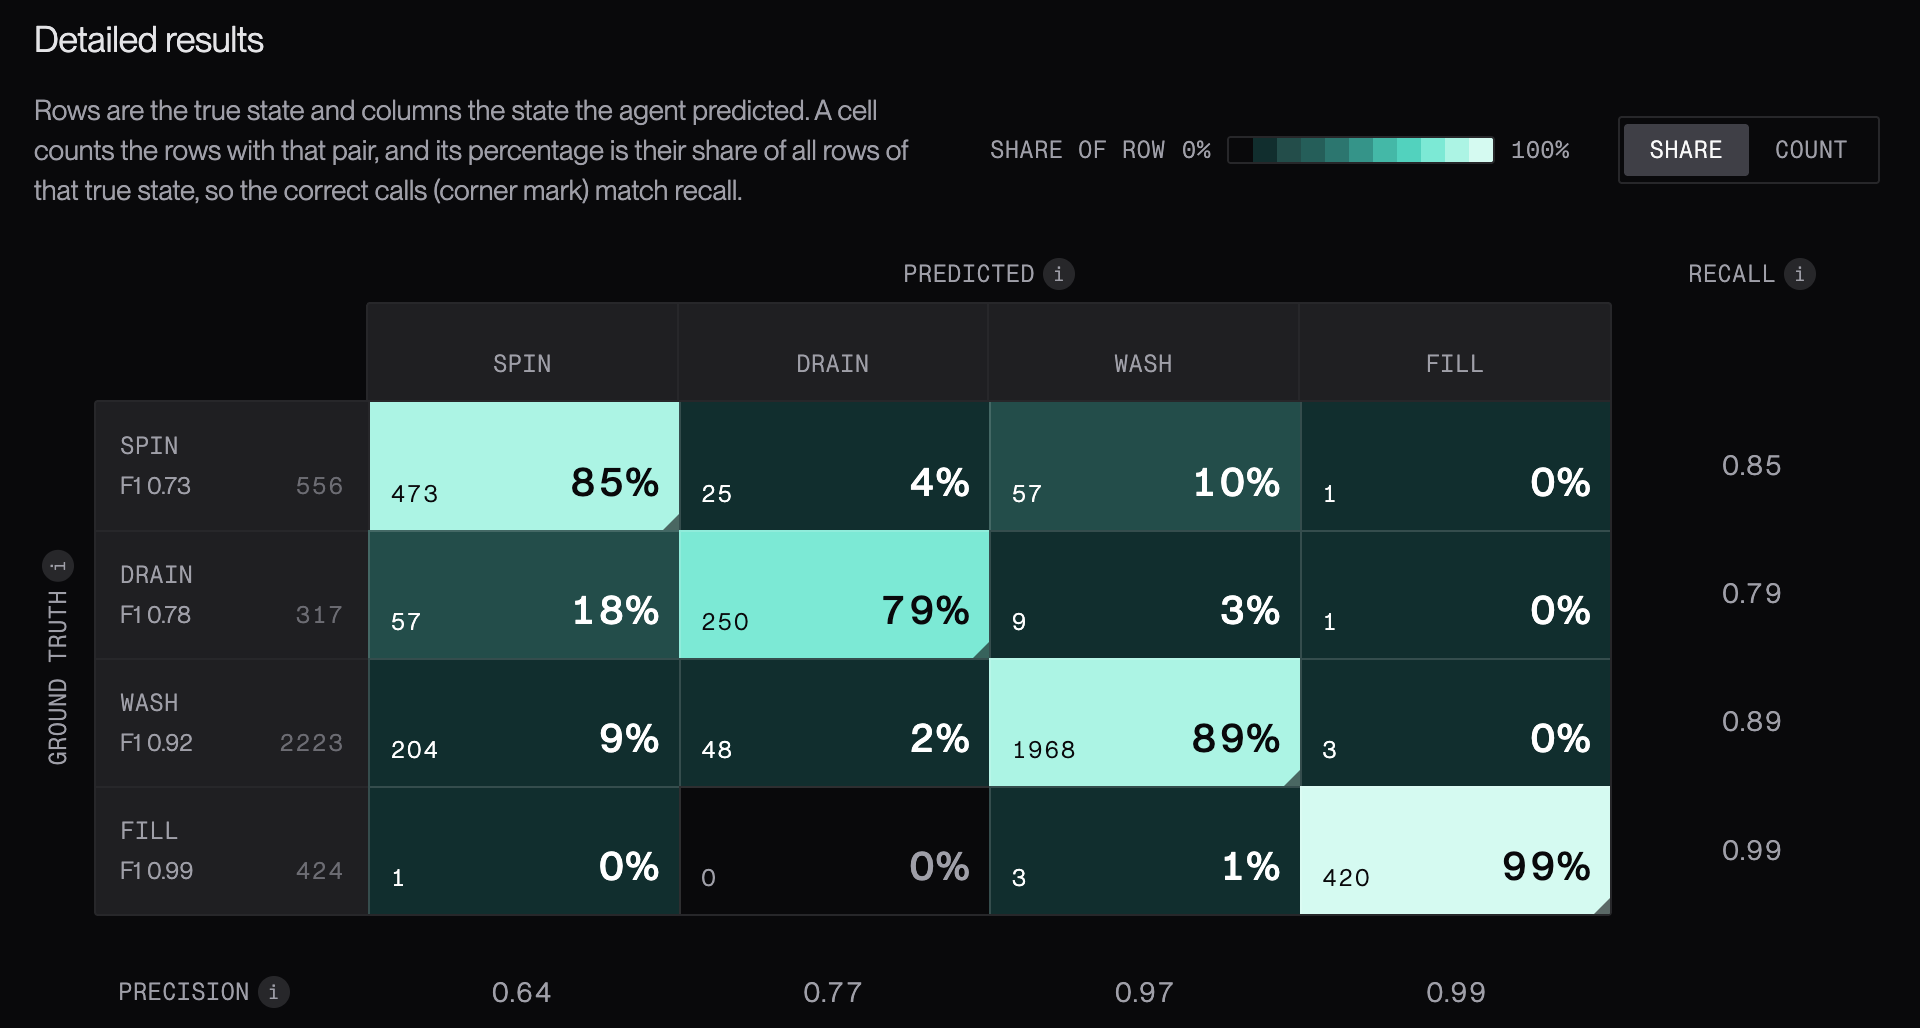
- The Results tab displays the tab’s headline score as chosen by the blueprint, its
accuracy, and other statistics. Under Detailed results, you’ll find a confusion
matrix in which rows represent the true state
while columns state the value predicted by the agent. The diagonal line from top-left to
bottom-right represents the cases where the prediction matched ground truth.